
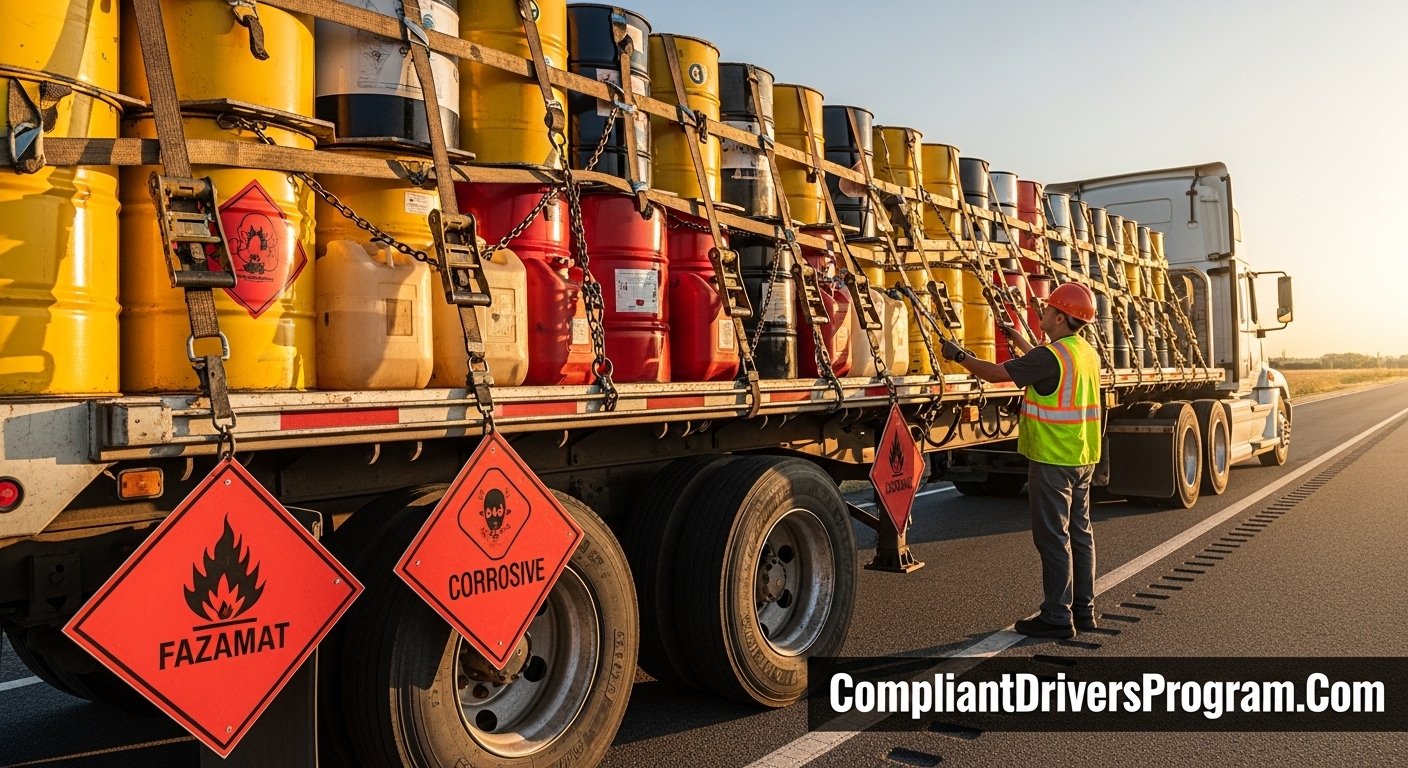
One loose drum of corrosive material. That’s all it takes to turn a routine haul into a full-blown hazardous spill on the interstate. You’d think every trucker hauling dangerous goods knows exactly how to lock down their freight. But the truth is, hazmat cargo securement trips up even experienced drivers during roadside inspections every single day.
If you’re hauling hazardous materials, you’re playing by a completely different set of rules. Standard tie-downs and basic blocking won’t cut it here. The DOT and FMCSA stack extra layers of responsibility on anyone who touches a hazmat load. This guide walks you through every requirement, every rule, and every practical step you need to nail hazmat cargo securement without second-guessing yourself. You’ll learn what inspectors actually look for, what gets drivers shut down, and how to stay ahead of costly mistakes.
Why Hazmat Loads Demand a Higher Standard Than Regular Freight
Let’s be honest for a second. Most drivers treat cargo securement the same way no matter what’s on the trailer. But hazmat transport rules exist because the consequences of failure aren’t just damaged goods. A shifted pallet of regular freight might cost someone money. A shifted pallet of flammable solids can cost someone their life.
The Federal Motor Carrier Safety Administration reports that hazmat-related incidents cause hundreds of injuries every year. Many of those incidents start with improper loading or poor securement on the vehicle itself. That’s why the rules surrounding hazardous materials securement go far beyond what you’d do for a standard dry van load.
When you haul hazmat, you’re not just a driver anymore. You become part of a chain that includes shippers, carriers, and emergency response teams. Every link in that chain depends on the load staying exactly where you put it. If something shifts, leaks, or falls during transit, you’re the one sitting behind the wheel when it happens.
The Federal Rules Behind Hazmat Cargo Securement
Here’s the thing most people skip over. Hazmat cargo securement isn’t governed by just one regulation. It pulls from multiple parts of the Code of Federal Regulations, and you need to know where to look. The main rules come from 49 CFR Part 393 for general cargo securement and 49 CFR Part 177 for hazmat-specific transport.
Part 393 covers your basic cargo securement rules like working load limits, tie-down requirements, and blocking and bracing standards. Part 177 adds the hazmat layer on top. It tells you how to load, segregate, and secure specific classes of dangerous goods based on their hazard type. You can’t follow one without the other.
The DOT requires that all hazmat freight must stay immovable during normal driving conditions. That includes acceleration, braking, turning, and road vibrations. Your securement system has to prevent the cargo from shifting in any direction. Understanding these cargo securement rules at a deep level separates compliant drivers from those who get hit with violations.
Breaking Down the Nine Hazard Classes and Their Securement Needs
Not all hazmat is created equal, and the way you secure each class varies quite a bit. The DOT recognizes nine hazard classes, and each one brings its own set of challenges when it comes to loading and securement. Knowing your hazard class tells you everything about how to handle the load properly.
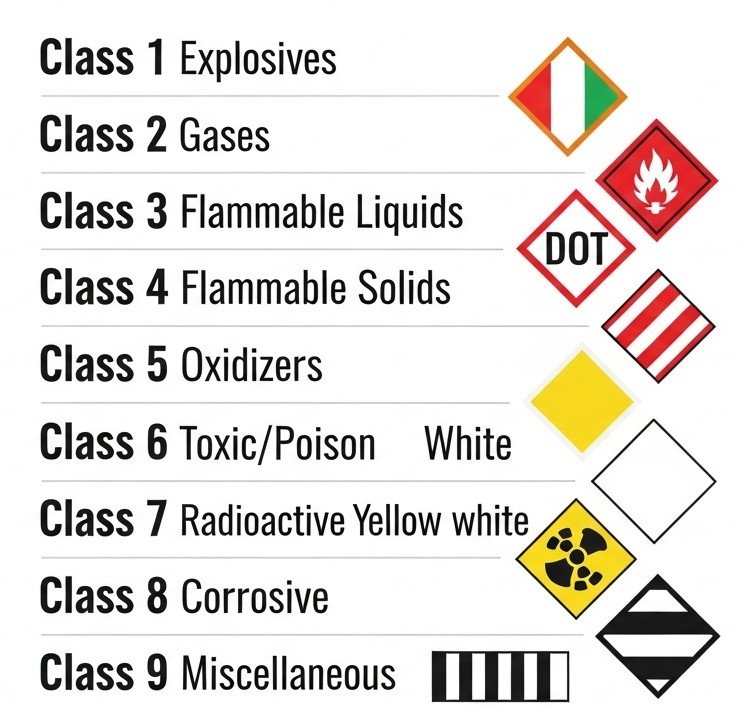
Class 1 covers explosives. These require the most restrictive securement because any impact or friction could trigger detonation. You need heavy-duty blocking, bracing, and padding between packages. The containers themselves can’t touch the vehicle walls without protective material in between.
Classes 2 and 3 deal with gases and flammable liquids. Compressed gas cylinders must stand upright and get secured individually or in approved racks. Flammable liquid containers need extra attention to prevent tipping or puncture. Classes 4 through 9 cover everything from flammable solids to miscellaneous dangerous goods, and each one has its own quirks for securement.
Pro Tip: Always check the Safety Data Sheet for every product you haul. It tells you the exact hazard class, compatibility issues, and any special requirements for transport.
How to Secure Hazmat Cargo Step by Step
So how to secure hazmat cargo properly without missing a step? Let's walk through the process from the moment you arrive at the shipper's dock. Getting this right every single time protects you, your CDL, and everyone else on the road.
Step 1: Inspect Your Vehicle Before Loading
You can't secure hazmat on a trailer that's already falling apart. Before anything goes on the deck, run a thorough pre-trip inspection checklist that covers the trailer floor, walls, doors, and securement devices. Look for holes, cracks, or weak spots that could let material leak through.
Check every tie-down point on the trailer for damage or wear. Make sure your straps, chains, and binders meet the working load limit for the freight you're hauling. Replace anything that looks questionable because inspectors won't give you the benefit of the doubt on hazmat loads.
Step 2: Verify Packaging and Labeling
Every hazmat package must arrive at your trailer in DOT-approved packaging. That's not your responsibility to create, but it's absolutely your responsibility to verify. If a box is torn, a drum is dented, or a label is missing, refuse the load until the shipper fixes it.
Check that every package has the correct hazard labels and markings visible on the outside. These labels guide emergency response teams if something goes wrong during transit. Missing or incorrect labels can result in serious fines and put first responders at risk.
Step 3: Load With Segregation in Mind
Segregation is one of the biggest areas where drivers mess up on hazmat loads. Certain hazard classes can't ride together on the same trailer. For example, you can't load oxidizers next to flammable liquids because the combination creates an extreme fire risk. The DOT Hazardous Materials Table provides the segregation chart you need.
Load incompatible materials as far apart as possible when they're allowed on the same vehicle. Use physical barriers between different hazard classes whenever regulations require it. Compatibility between products dictates your entire loading plan, so figure this out before anything hits the trailer floor.
Step 4: Block, Brace, and Tie Down Everything
Now comes the actual securement work. Every hazmat container needs blocking on all four sides to prevent lateral movement. Use lumber, airbags, or approved dunnage to fill gaps between packages and between packages and trailer walls.
Apply enough tie-downs to meet the aggregate working load limit for the total weight of the shipment. For most loads, you need at least one tie-down for every ten feet of cargo length plus one additional tie-down. Drums and cylinders need individual securement or approved cradle systems that prevent rolling.
Step 5: Apply Placards and Verify Documentation
Once the load is secure, your trailer needs the correct placards on all four sides. Placards communicate the hazard class to other drivers, emergency crews, and inspection officers. Wrong placards or missing placards will get you pulled out of service instantly. Make sure you understand the full hazmat placards requirements before you roll.
Double-check your shipping papers, emergency response information, and any special requirements listed for the specific materials you're hauling. Keep these documents within arm's reach in the cab at all times. Everything needs to match between the paperwork, the labels, and the placards on the outside of the trailer.
Who Is Responsible for Hazmat Cargo Security
This question comes up constantly, and the answer might surprise you. Who is responsible for hazmat cargo security? Legally, the responsibility falls on multiple parties, not just the driver. The shipper, the carrier, and the driver each carry specific duties under federal law.
The shipper must properly classify, package, label, and mark every hazmat shipment. They also need to provide accurate shipping papers and emergency contact information. If the shipper hands you a mislabeled load, they're on the hook for that violation.
The carrier is responsible for making sure their equipment meets DOT standards for hauling hazardous materials. They must train drivers, maintain vehicles, and keep proper insurance in place. Good DOT compliance for trucking means the carrier stays proactive about every requirement.
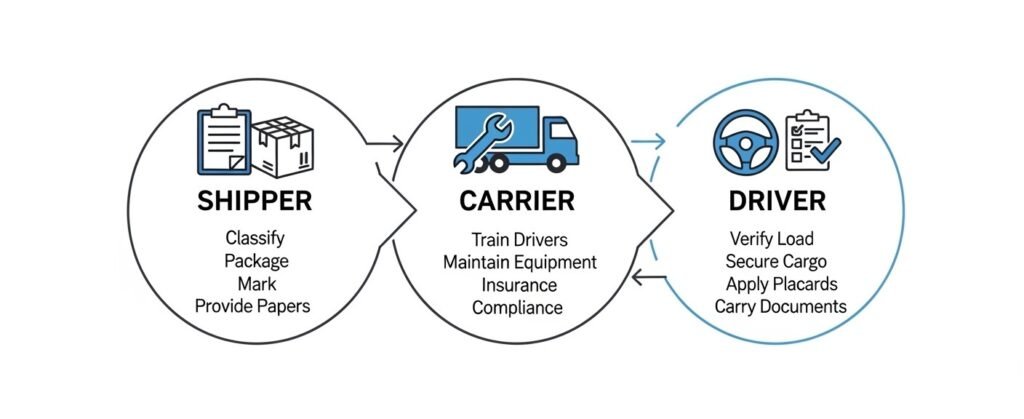
The driver bears the final responsibility at the point of transport. You must verify the load, secure it properly, apply placards, and carry the right documentation. If you accept a load that violates any regulation, you own that violation once your wheels start turning. That's why having your hazmat endorsement and proper training matters so much.
Common Violations That Get Hazmat Drivers Shut Down
Most people don't know this, but hazmat violations carry some of the highest penalties in trucking. A standard cargo securement violation might get you a warning or a small fine. A hazmat securement violation can put you out of service on the spot and cost thousands of dollars in penalties.
Here are the violations inspectors find most often on hazmat loads. Missing or incorrect placards top the list almost every year. Drivers either forget to placard all four sides or use the wrong class placard for the material they're hauling.
Improper segregation ranks as the second most common issue. Inspectors find incompatible materials loaded side by side with zero separation. This creates genuine danger and shows a lack of training or attention. Insufficient tie-downs and missing blocking round out the top violations that lead to out of service violations during roadside checks.
Pro Tip: Before every trip, do a "worst case" mental check. Ask yourself what happens if you slam the brakes at 65 mph. If anything on that trailer could shift, leak, or fall, fix it before you leave.
Hazmat Securement for Different Trailer Types
The trailer you're using changes your securement approach significantly. Flatbed trailers, dry vans, and tankers each present unique challenges when hauling hazardous materials. You can't apply a one-size-fits-all method and expect to pass inspection.
Flatbed loads require external securement devices like chains, straps, and edge protectors. Every container sits exposed to weather and road debris, so you need extra protection against environmental damage. Learn the full breakdown of how to secure cargo on flatbed trailers before hauling hazmat on open decks.
Dry van trailers provide more protection but create their own securement challenges. You can't see the load shift through solid walls, so your initial blocking and bracing must be rock solid. Tanker trailers hauling liquid hazmat require a tanker endorsement and knowledge of surge dynamics that affect vehicle handling during braking and turns.
The Real Cost of Getting Hazmat Securement Wrong
Let's talk money because that's what gets everyone's attention. A single DOT hazmat cargo violation can carry fines ranging from $450 to over $80,000 depending on severity. Repeat offenders face even steeper penalties that can shut down entire fleets.
Beyond fines, a hazmat incident caused by improper securement triggers cleanup costs that reach into the hundreds of thousands. Environmental remediation for a chemical spill on a highway doesn't come cheap. Your cargo insurance for truckers may cover some of these costs, but policies have limits and exclusions for negligence.
The career impact hits hard too. A serious hazmat violation goes on your PSP report and stays visible to every carrier that checks your record. Some violations can lead to CDL disqualification, which means you're out of a job entirely. The time and money you invest in proper securement is nothing compared to the cost of getting it wrong.
Inspection Survival Guide for Hazmat Loads
Every driver hauling hazardous materials should expect more frequent inspections. DOT officers target hazmat vehicles because the stakes are higher. A Level 1 inspection on a hazmat load covers everything from your brakes to your shipping papers to your securement system. Understanding what happens during a DOT truck inspection helps you prepare.
Inspectors will check that your placards match your shipping papers exactly. They'll verify the hazard class, UN identification numbers, and proper shipping names. Any mismatch between documents and placards raises immediate red flags.
They'll physically examine your securement devices, blocking, and bracing. They'll look for damaged straps, insufficient tie-downs, and improper segregation of incompatible materials. They'll also verify that you have the correct CDL endorsements for the type of hazmat you're hauling. Walk around your rig before every trip and inspect it like a DOT officer would. Catch problems before they catch you.
Hazmat Securement Quick Comparison
| Securement Factor | Standard Cargo | Hazmat Cargo |
|---|---|---|
| Minimum Tie-Downs | 1 per 10 ft + 1 | 1 per 10 ft + 1 (stricter enforcement) |
| Blocking Required | When necessary | Always required on all sides |
| Segregation Rules | Not applicable | Mandatory by hazard class |
| Placarding | Not required | Required on all four sides |
| Documentation | Bill of lading | Shipping papers + emergency info |
| Inspection Frequency | Random | Targeted and more frequent |
| Violation Penalties | $100-$1,000 | $450-$80,000+ |
| Driver Endorsement | None for most freight | Hazmat endorsement required |
FAQ
A: The DOT focuses heavily on proper placards, correct segregation, sufficient tie-downs, and matching documentation during inspections of hazardous materials loads.
A: Hazmat load securement rules add mandatory blocking on all sides, segregation by hazard class, placarding on four sides, and stricter penalties for violations.
A: The shipper, carrier, and driver all share legal responsibility. The driver carries final accountability once the vehicle is in motion with the hazardous materials loaded.
A: Some classes can ride together, but many require segregation or complete separation. Always check the compatibility chart in 49 CFR Part 177 before loading mixed hazmat.
A: You'll likely receive an out-of-service order, face fines up to $80,000 or more, and get the violation added to your driving record permanently.
A: Yes. Federal law requires hazmat-specific training every three years. You also need a valid hazmat endorsement on your CDL to transport dangerous goods.
A: Check your securement within the first 50 miles, then every 150 miles or every 3 hours after that. Hazmat loads deserve extra stops beyond the minimum requirement.
Your Next Move Toward Hazmat Compliance
Getting hazmat cargo securement right isn't optional, and it isn't something you figure out on the fly. Every step from pre-trip inspection to final delivery matters when you're hauling hazardous materials down the highway.
Here's what to remember:
- Always verify packaging, labels, and placards before accepting any hazmat load
- Block and brace every container on all four sides regardless of trailer type
- Follow segregation and compatibility rules without shortcuts
- Expect inspections and prepare for them on every single trip
Your best next step is to review your current securement practices against the federal standards covered in this guide. Fix the gaps now before an inspector finds them for you.
This article provides general information about hazmat cargo securement regulations. Always consult current federal regulations and a qualified safety professional for compliance decisions specific to your operation.







![DOT Drug Test: What You Must Know in 2026 [Full Guide]](https://compliantdriversprogram.com/wp-content/uploads/2026/03/DOT-Drug-Test-150x150.jpeg)



Leave a Reply